Many of the smart home devices currently in use operate using http as the control protocol.
The device usually provides a web server and a control API.
Commands are issued using the GET and or POST methods See Controlling devices using http for more details.
In this tutorial we will look at how we can control and monitor a Tasmota switch using http.
Turning a Tasmota switch on/off involves sending the command using url parameters with the GET method.
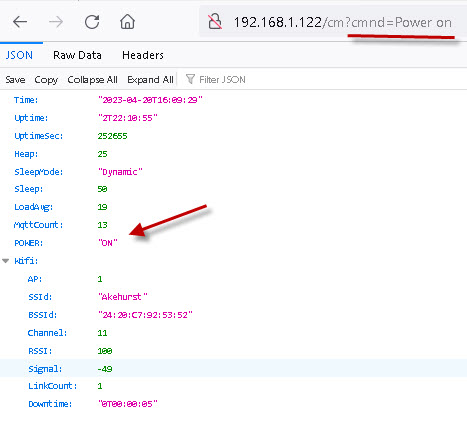
You can test this easily using a web browser.
In Home assistant we need to use the command line Integration as the REST integration will only send commands using the POST and PUT methods but we need to use the standard GET method.
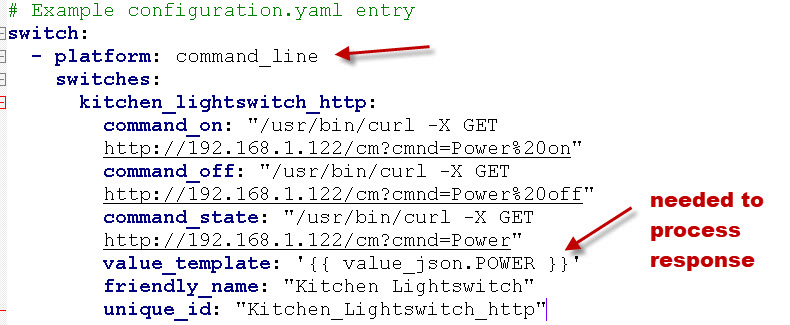
An example yaml file entry is shown below:

Note we use the switch integration with the command line platform. The IP address of my switch is 192.168.1.122 and to turn it on and off we use the url parameters. The command is sent using curl.
You can test the command using a web browser and you see the response which is a JSON object shown below:

We need to extract the value from the response otherwise the switch in the dashboard doesn’t reflect the status. We do this using the value template:
value_template: '{{ value_json.POWER =="ON"}}'
Notice it is case sensitive so we use “ON” not “on” and we need single quotes around the string as we have double quotes inside it.
The value template needs to evaluate to True.Ref Integrations-command line
Restful Switches
If the switch needs to be controlled by POST requests then we need to use the rest integration.
The following example yaml entry is for a rest switch.
  - platform: rest
    method: POST
    resource: "http://192.168.1.31:8000"
    device_class: switch
    name: "test_http_switch"
    body_on: '{"power": "on"}'
    body_off: '{"power": "off"}'
    unique_id: "test_http_switch"
    is_on_template: '{{value_json.power=="on"}}'
Notice that we are using the POST method as the rest integration only supports POST and PUT.
Th resource is the IP/domain name of the switch and includes the port.
body_on and off are the values returned by the switch when it is switched, and also the values sent to the switch to change its state.
The values are sent as JSON data.
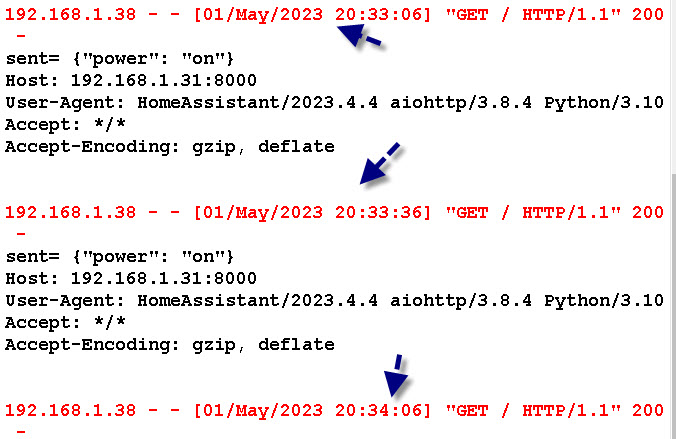
With the rest switch home assistant sends a Get request every 30 seconds to get the switch state.
If you change the switch state manually or by using MQTT for example then the dashboard icon will refresh to reflect this after a short delay.
You can clearly see this in the screen shot below as the switch I used was a simulated python switch.

If you are interested then you can download the python script below.
Problems encountered
I often got different switch icons on the dashboard which seemed to be caused by home assistant not seeing a value for the switch.
This is what I often got:
![]()
I Goggled it and found this on the forums. Mine eventually worked without setting an assumed state.
Related Tutorials and Resources:
- Adding a MQTT Sensor To Home Assistant
- Running Home Assistant in a Docker Container
- Adding an MQTT Device to Home Assistant
- Controlling Smart Home Devices
- Understanding Smart Home APIs
