![]() In a recent poll on the site Home assistant was by far the most popular home automation system.
In a recent poll on the site Home assistant was by far the most popular home automation system.
What is Home Assistant ?
Home Assistant is free and open-source software for home automation designed to be a central control system for smart home devices with a focus on local control and privacy.
It is controlled via a web interface (Lovelace dashboard) and can also be controlled with voice commands using Google home or Alexa with the appropriate integrations. –wiki
It is written in Python and can be installed as a Python application, but most commonly it comes as an OS (operating system hass.io) on raspberry Pi or as a Docker Image that can be run on Windows or Linux.
If you are unfamiliar with the different home assistant versions then see here for an explanation.
See here for detailed installation instructions.
I first installed Home assistant many years ago as a Python application, but now having returned to working with it and now I use a docker image on Linux.
Installing on a raspberry Pi 4 is currently difficult due to the lack of availability of the raspberry Pi 4.
Getting Started
Once installed you manage it via a browser by connecting to port 8123.
The first step is initial configuration. Home assistant calls this process onboarding.
You will need to enter a user name and password and select your location.
This is used to create a home zone.
Then Home assistant will display any devices that it has discovered on your network.
In my case there weren’t any.
Understanding the Basics
Home assistant lets you manage smart home devices. A smart home device is represented by entities and a device name.
A device can have many entities which I regard as properties or attributes.
In addition a device may be associated with integrations which I see as a service of piece of software that lets you manage/discover a particular device or entity.
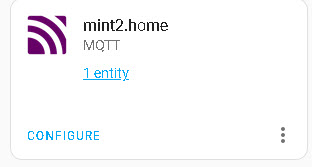 As an example to work with MQTT devices you need to install the MQTT integration and to auto detect Tasmota devices you will need to install the Tasmota integration.
Dashboards
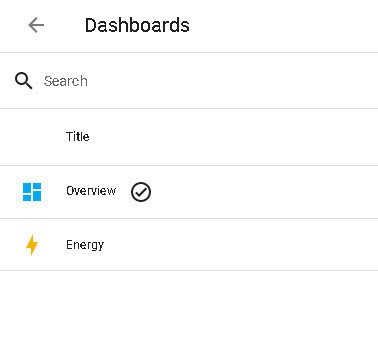
The default dashboard is called Lovelace.
There is also an energy dashboard. See dashboards
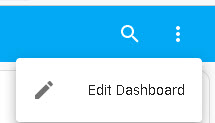
You can edit the dashboard by clicking on the menu icon (3 dots) in the top right corner.
 You can add additional cards and edit existing cards. To change the actual layout/view you need to make changes to the configuration.yaml file.
Zones Areas and Groups
Home assistant lets you create a zone which is a geographical area specified by GPS coordinates.
A home Zone is created as part of the initial configuration.
You can create your own areas like living kitchen etc. Areas lets you organise devices based on location.
Groups let you organise devices on an adhoc basis e,g you could create a group for all of the outside lights.
Automations
Automations allow you to configure events to trigger actions. As an example you could configure a light to turn on when someone comes home.
The developer tools section contains the automations editor which you can use to create and test automation.
The configuration.yaml File
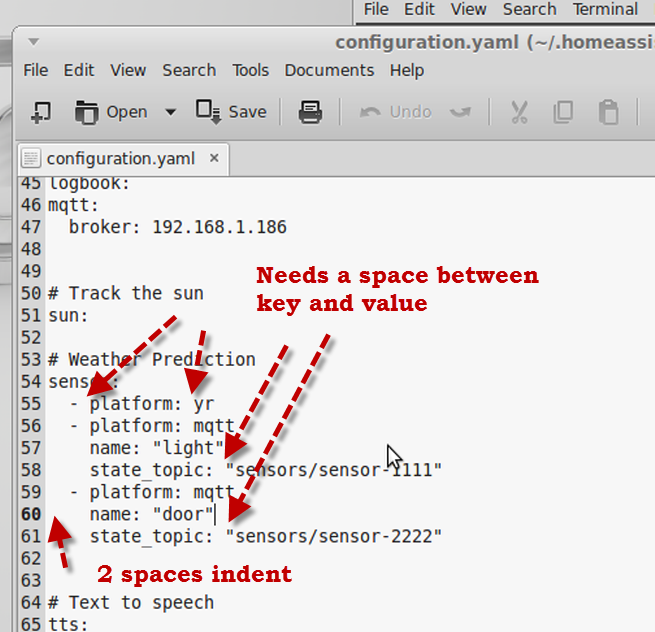
You cannot go far with home assistant without meeting the configuration.yaml file.
In the early days of home assistant all configuration was done by manually editing this file.
Even though many changes don’t involve editing the file it is still necessary and you should be prepared to do it.
You need to be careful with the syntax as spaces are important between the keys and values.
Checking the config file doesn’t result in errors but it doesn’t work in you are missing the spaces.
If you are unfamiliar with the yaml file syntax take a look at this very useful guide. YAML tutorial.
Personally I find converting the file to JSON makes it easier to understand there is an online tool to do that here.
Developer Tools and Settings
In the left sidebar are two links that you will be using often. They are developer tools and settings.
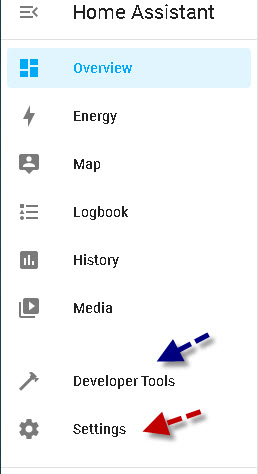
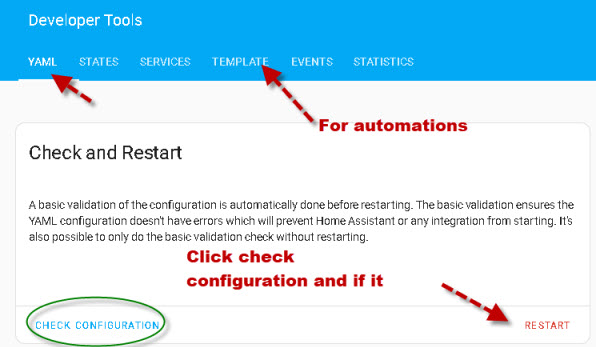
The deleoper tools is used to check the configuration.yaml file after you have edited it and if it check ok then you can restart home assistant so the new configuration takes effect.
You should note that it doesn’t have an editor for the configuration.yaml file.
It also lets you create and test templates for automations as shown in the screen shot below
The settings menu is where you go to add integrations and manage devices and entities.
You can also manage automations, and create areas and zones as shown in the screen shot below.

Home Assistant Tutorials
- Home Assistant-Entities,Devices ,Platforms and Integrations
- Control and Monitor HTTP Devices in Home Assistant
- Home Assistant Configuration.yaml File Basics
- Adding a MQTT Sensor To Home Assistant
- Running Home Assistant in a Docker Container
- Adding an MQTT Device to Home Assistant
- Home Assistant Templating for Beginners -Part 1
- Control Zigbee Devices Using Zigbee2MQTT with Home Assistant
- Smart Home Automations With Home Assistant
- Using Tasmota Devices with Home Assistant and MQTT