When adding a MQTT device to Home Assistant you have 4 options
- Manual setup using configuration.yaml file.(All MQTT devices)
- Auto setup using configuration data sent on the config topic.(All MQTT devices)
- Auto setup using configuration data sent using the SeOption19 option and MQTT auto discovery.(Tasmota only)
- Auto setup using configuration data sent using MQTT auto discovery and the Tasmota integration. (preferred but Tasmota only)
In this tutorial we will look at the first two methods manual and auto using configuration data sent in an MQTT payload.
Manual Setup- Editing the configuration.yaml File
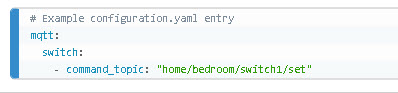
One of the confusing things I found when doing this is that there are a lot of tutorials on the internet explaining how to do it the old way. So you would see entries like this:

Whereas the correct format is:
Here are links to the documentation MQTT switch and MQTT sensor.
Example:MQTT switch configuration
mqtt:
  switch:
    - unique_id: bedroom_switch
      name: "Bedroom Switch"
      state_topic: "home/bedroom/switch1"
      command_topic: "home/bedroom/switch1/set"
      availability:
        - topic: "home/bedroom/switch1/available"
      payload_on: "ON"
      payload_off: "OFF"
      state_on: "ON"
      state_off: "OFF"
      optimistic: false
      qos: 0
      retain: true
There are a couple of interesting settings that you need to be aware of.
From the above you will see that the switch publishes it’s state on the topic home/bedroom/switch1 and the options are ON and OFF.
You can turn the switch on/off by publishing a message on the topic home/bedroom/switch1/set with a payload of ON or OFF.
You should note that case is important.
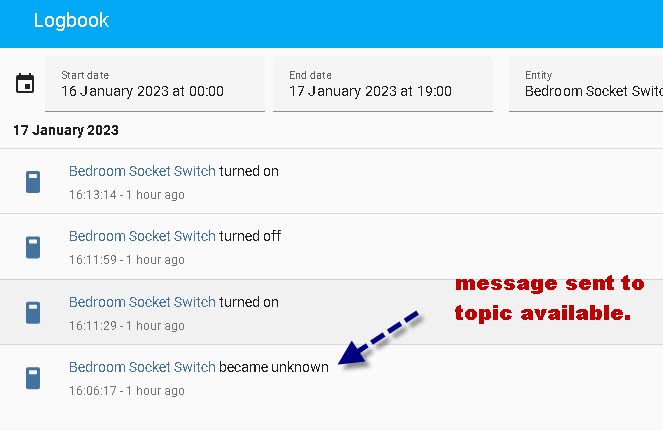
The availability topic is interesting and it is also optional.
If you include it then the switch will show a status of unavailable and sending it a command has no effect.
This is what it looks like in home assistant:

To make it available you need to send a message on topic home/bedroom/switch1/available with a payload of online.
Once it is available then you can add it to the dashboard and control it from the dashboard which I cover later as part of the auto install.
Auto Setup By Sending Configuration Data
When you enable MQTT discovery home assistant lets you setup a discovery prefix topic which by default is homeassistant.
Configuration information is sent using this topic prefix and a final topic string of config.
So we have:
homeassistant/……./config
The actual topic structure is described here and is shown below:
<discovery_prefix>/<component>/[<node_id>/]<object_id>/configNote the node_id is optional. A real world example is shown below and taken from this tutorial.
homeassistant/sensor/plant_sensor_1/temperature/config
In addition to the topic format the payload must also follow a set format.
The payload is sent as a JSON encoded dictionary.
The following is taken from the docs
The payload must be a serialized JSON dictionary and will be checked like an entry in your
configuration.yamlfile if a new device is added, with the exception that unknown configuration keys are allowed but ignored. This means that missing variables will be filled with the component’s default values. All configuration variables which are required must be present in the payload.
Python example:
The python example configures an MQTT switch just like the one in the manual configuration described above.
We first need to create our configuration data as a python dictionary as shown below:
payload={"unique_id": "bedroom_socket_switch",
      "name": "Bedroom Socket Switch",
      "state_topic": "home/bedroom/bedroom_socket_switch",
      "command_topic": "home/bedroom/bedroom_socket_switch/set",
      "availability_topic":"home/bedroom/bedroom_socket_switch/available",
      "payload_on": "ON",
      "payload_off": "OFF",
      "state_on": "ON",
      "state_off": "OFF",
      "optimistic": False,
      "qos": 0,
      "retain": True
 }
payload=json.dumps(payload) #convert to JSON
We then convert it to JSON using json.dumps and send it on the topic.
homeassistant/switch/bedroom_socket_switch/config
r=client.publish(config_topic,payload,QOS,retain=True)
If you look at the broker console you will see that when home assistant receives the setup instructions it subscribes to the topics included in the setup data as shown in the screen shot below:
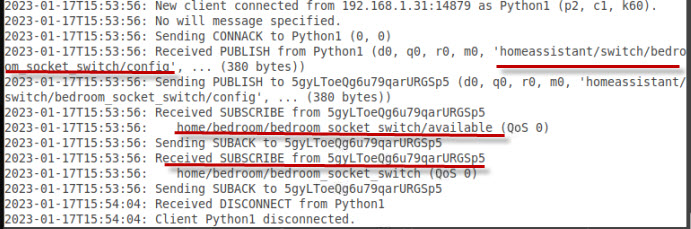
The switch then appears as an entity in home assistant with a red icon as it is currently unavailable.

So now we need to send a message on the available topic as described earlier.
topic=home/bedroom/bedroom_socket_switch/available
message =online
Important -You also need to set the retain flag when you publish otherwise you will need to resend the config data if you shut down and restart home assistant.
When you do this the switch becomes active.
Note online is lower case.
Below shows the command I used to make the switch available and then turn it on..

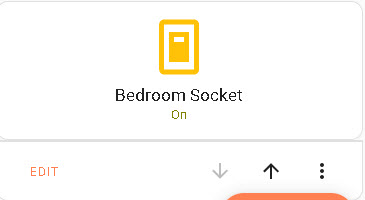
Once the device appears as an entity you can add it to the dashboard using a card.
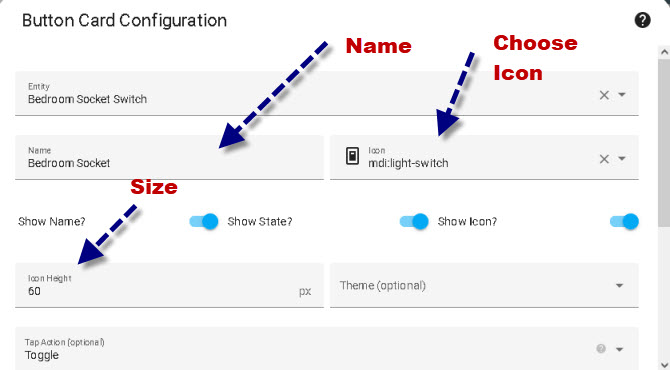
And this is what it looks like
Python Config Script Download

Device Configuration information Storage in Home Assistant
Home Assistant doesn’t appear to store the device configuration information anywhere but instead publishes it to the MQTT broker as a retained message.
This means that when it restarts it receives the configuration data from the broker when it subscribes to that topic.
For this to work reliably the broker needs to be configured with a persistent data store.(mosquitto).

Related Tutorials and Resources
- Home Assistant Configuration.yaml File Basics
- Running home assistant in a docker container
- Smart Homes and MQTT
- Adding a MQTT Sensor To Home Assistant
How do I get access to that configuration.yaml?
Home asssistant just tells me that everything is setup when I try to configure a device.
And on the device itself I don’t find a way to access any yaml.
It should be in the root folder
https://community.home-assistant.io/t/where-is-my-configuration-yaml-and-config-folder/228296/11
Rgds
Steve
Okay, from that I guess this guide is about changing the yaml of home assistant?
In that case I would also need to know how it corresponds to which thing on the device side. As is, I have no Idea what parts of these settings are protocol/keywords and which parts are given names.
have you seen this
https://stevessmarthomeguide.com/home-assistant-configuration-yaml-file-basics/
rgds
steve
When a device is auto-added, and its battery dies, it later has a sensor id, which in turn gives it a new device id. This breaks all existing sensors, dashboards, automations, etc. How do you fix that? I can see the MQTT topic the device is subscribed to, but cannot edit it. In MQTT, I see the new topics being published. Is there a fix, or do I have to update all the dashboards, automations, etc every time the battery is replaced?
Thanks for your tips. I cannot find an answer anywhere
So the device gives itself a fresh id after the battery change? Is there a way of setting the sensor id or is it fixed? What is the device?
rgds
Steve
super nice,
I would have however added description how to make many sensors belonging to 1 device on home assistant so that you don’t have sensors scattered all over in HA
Hi Steve,
Thank you for this very useful article.
Could you please detail Better the steps After “We then convert it to JSON and send it on the topic”. As a biginner I can’t Guess It.
Kind regards,
Andrea
Andrea
I have added some more detail to the tutorial let me know it it is enough. Don’t worry if it isn’t just tell me and I will try again.
Rgds
Steve