![]() One of the fastest and easiest ways of trying home assistant is by using docker, especially if you are already using Docker for running other applications.
One of the fastest and easiest ways of trying home assistant is by using docker, especially if you are already using Docker for running other applications.
The docker container is here
To download it to your system just use the command
docker pull homeassistant/home-assistant
Note: I did receive a comment that the version returned with the above command gave problems. If you do have problems here is an alternative.
sudo docker pull ghcr.io/home-assistant/home-assistant:stable
You should note that with the Docker version of home assistant you cannot use add-ons but this really isn’t a problem.
If you are unfamiliar with the different home assistant versions then see here for an explanation.
Configuration Data Storage
Most applications create data and have configuration files.
You can let the applications store any data it creates or any configuration data it uses in the container itself.
If you do this then if you delete the container then this data is lost.
Therefore it is normal to store data in persistent storage that doesn’t depend on the container itself.
Before you run home assistant in docker you need to first decide where you will store persistent data.
Docker has two options:
- Volumes
- Bind mounts
Docker recommends using volumes as these are totally managed by Docker and don’t depend on your file system structure.
However the docker install instructions use bind mounts and that is what I will use here.
Using a Bind mount with Home Assistant
With a bind mount we effectively map an internal folder structure to an external one outside the container.
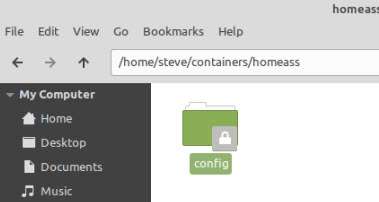
So to do this we first need to create a folder in our file system to map to.
I use a root folder for the all docker containers as I run several docker images.
In this folder I create a folder called homeass and then a sub folder called config
So we have as a path /home/steve/containers/homeass/config
Now we use the docker run command to run the container.
It is important to note that we use the –network option otherwise home assistant will not find many of the services on the local network.
The command I use is slightly different than that given in the install instructions here and is shown below:
docker run -d --name homeassistant -v /home/steve/containers/homeass/config:/config --network=host homeassistant/home-assistant
You should notice the use of the –network switch. If you don’t use this switch then auto discovery of many devices fails.
You can stop it using:
docker stop homeassistant
and start it using:
docker start homeassistant
Note the storage mapping is done with the -v switch:
-v /home/steve/containers/homeass/config:/config
Editing the configuration.yaml File
If you look in the config folder that you created in the shared folder then you will see the configuration.yaml file along with other files.
There are various ways of accessing it but you will notice it is protected.
The way I do it is to use copy and paste the configuration.yaml file from docker into a local temp folder and then edit it and copy it back.
So imagine we are in the local folder called temp:
to copy the existing configuration file we use the docker cp command
docker cp homeassistant:/config/configuration.yaml configuration.yaml
which copies it from the docker image to your local storage.
Now we edit it and copy it back.
docker cp configuration.yaml homeassistant:/config/configuration.yaml
You could also use the chown command to set owner in the local folder that contains the configuration.yaml file and the set the correct permissions before editing the file in the local shared folder, but you find that each time you start the container as the permissions revert back to being root only.
Note: You may also find reference to studio code and file editor add-ons but these cannot be used on the docker version of home assistant.
In addition many people use portainer to manage docker containers, and if you do then you can configure it so that the configuration.yaml file can be edited from with the Home assistant GUI.
Useful docker Commands
To open a bash shell in a docker container called homeassistant use:
docker exec -it homeassistant /bin/bash
to delete a container use
docker remove hommesassitant
to view containers
docker ps -a #all containers
or
docker container ls -a #all containers
docker container ls #running containers
Connecting to Home assistant running Docker
The container will generally use the standard home assistant port of 8123.
Common Questions and Answers
Q -What is a docker compose file?
A – A Docker Compose file is a YAML file that defines services, networks, and volumes for a Docker application.
It can be used to configure and start multiple containers for an application, in a single command.
The file is used in conjunction with the docker-compose command-line tool, which reads the file and starts the defined services.
Using a docker compose file allows for easy management and scaling of multi-container applications.
Do I need a docker compose file to run Home Assistant in Docker?
A- No you can just use the run command with the appropriate switches..
Q- Why is there no port mapping declaration in the run command?
A- Because we are using the –network switch.
Resources and related Tutorials
- Docker container volumes vs bind mounts
- Docs-Home assistant install on docker
- Smart Homes and MQTT
- Adding an MQTT Device to Home Assistant
Hi,
In order to get last stable version, I had to replace
sudo docker pull ghcr.io/home-assistant/home-assistant
by
sudo docker pull ghcr.io/home-assistant/home-assistant:stable
With the first command, I was stuck with the initially enabled version (2022.3).
Hope this is of interest.
Jimmy.
Tks for letting me know I will update the tutorial.
Rgds
Steve
Hi,
Total nooby to this….I bought a sonoff ihost and have loaded home assistant in the docker part…. How do I use this to add zigbee devices etc…
Any help or direction would be much appreciated
thanks
I have just added a new tutorial on using Zigbee
https://stevessmarthomeguide.com/control-zigbee-devices-using-zigbee2mqtt-with-home-assistant/