The tasmota firmware supports both the http and the MQTT protocol and you can use either protocol to control the switch. See Control the switch using http and Node-red
Controlling the Tasmota SonOff Switch with MQTT
In this tutorial we will look at controlling the Tasmota SonOff Switch using node-red and the sonoff-tasmota node
You will need to first install the node. It is called node-red-contrib-sonoff-tasmota

The install creates a new category Sonoff and the node called Sonoff device.

The node is effectively a wrapper over MQTT.
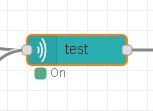
To use the node just drag it into the workspace.
The node has input and output connections.
In the flow below we use an inject node to send a command and a debug node to see the output.
In reality the output node shows us what we sent to the node and not what is sent on by the node using MQTT.
To view the messages sent by the node, and also received by the node we can use the mosquitto_sub tool.
In the screen shot below the node is connected to the broker and reports the switch state as ON even though It is not connected.
When deployed the node sends a status request message but doesn’t get a response.

Configuring the Node
Below is a screen shot of the node configuration screen.
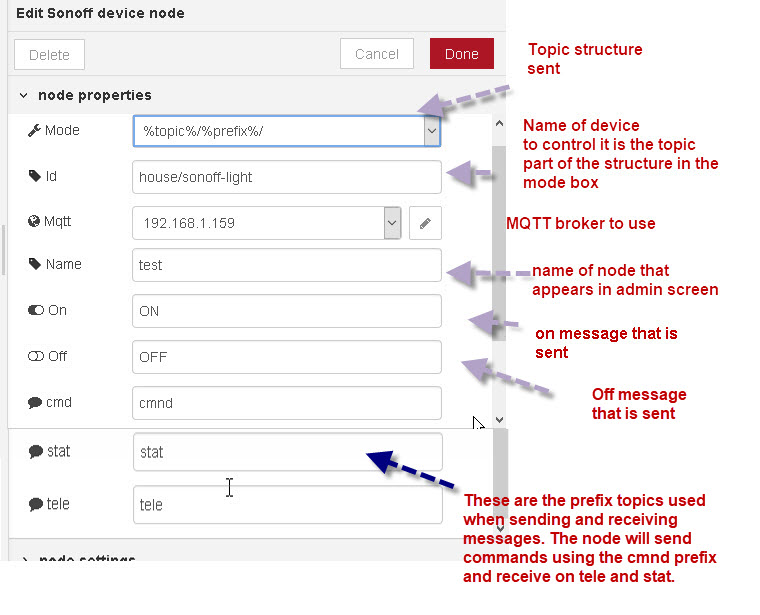
You need to set the mode to match the topic scheme you are using on the network.
The options are
%topic%/%prefix% or %prefix%/%topic%
The topic is the id you configure in the id field and the prefix is cmnd,tele or stat.
So using our structure we will see messages with the following topics:
house/sonoff-light/tele
house/sonoff-light/stat
house/sonoff-light/cmnd
You can set the on/off values that the node sends when it is triggered.
To trigger the on value to be sent you inject Boolean true. To trigger the off value to be sent you inject Boolean false.
Alternatively you can also use ON,OFF
Below is the configuration of the inject node for triggering the on value.
Note: There is no need to configure the topic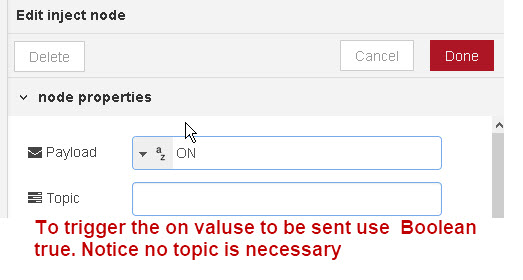
Turning the Switch on and Off
The flow in the download is a simple flow to send on/off to a switch using the inject nodes.
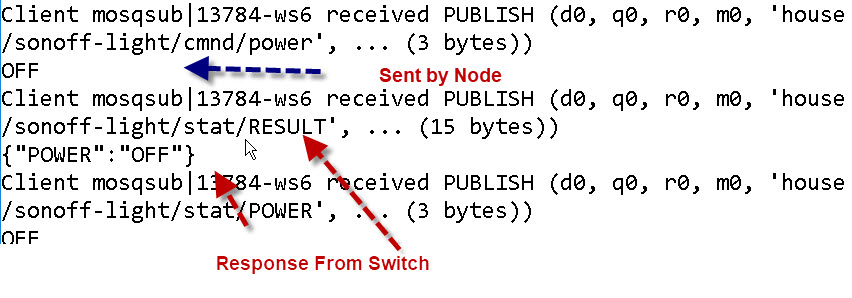
The screen shot shows the messages sent between the node and the switch.
Turn On
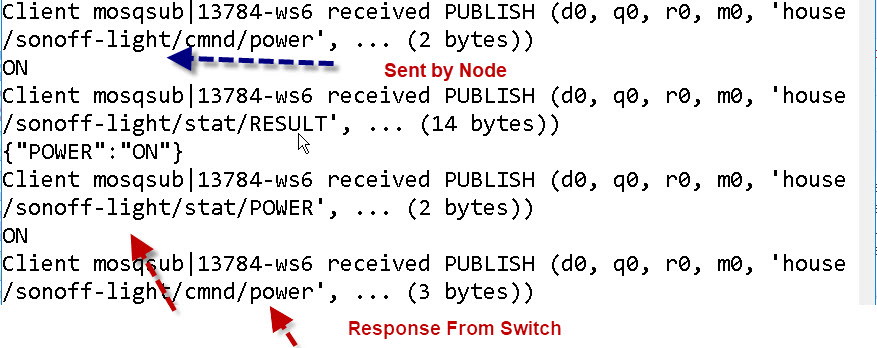
Turn OFF
Flow Download

Using the Mosquitto Publish Node
As mentioned previously the tasmota-sonoff nodes are just wrappers over the standard mosquitto nodes.
Therefore rather than install these extra nodes it is just as easy to use the standard mosquitto nodes.
The flow is similar to the previous one and is shown below:

The inject node now needs to contain the topic as shown below:

Tasmota Topic Structure Notes
In the examples above i have used a structure like this
house/%topic%/%prefix%
where house is a topic base. Using a base of house allows you to have several tasmota networks.
However I have now moved to a more general topic base of tasmotas/old_topic_base.
I did this because Shelly devices publish by default on the topic base of shellies and so using a base of tasmotas lets me separate the two sets of devices.
Related Tutorials and resources:
- Introduction to Sonoff Switches
- Setting up the Sonoff Tasmota MQTT Switch
- Tasmota and Node-Red Project
- Controlling Tasmota switch Using HTTP and node-red
Related Tutorials
- Setting up the Sonoff Tasmota MQTT Switch
- Introduction to Sonoff Devices
- Smart Home and MQTT
- Install Mosquitto Broker on Raspberry Pi
- Tasmota and Node-Red Project
Poorly written – tried my best to understand, since I need this functionality – failed miserably.
Sorry you are having problems what do you need to understand.
Rgds
Steve
To start with what is and how do you install node-red-contrib-tasmota?
You click on the menu bar top right and then manage pallette and click the install tab and enter tas in search box and it comes up at the top of the list and then click the install button.