The tasmota firmware supports both the http and the MQTT protocol and you can use either protocol to control the switch.
Controlling the Tasmota SonOff Switch with MQTT
In this tutorial we will look at controlling the Tasmota SonOff Switch using node-red and the sonoff-tasmota node
You will need to first install the node. It is called node-red-contrib-sonoff-tasmota

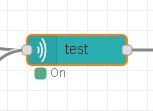
The install creates a new category Sonoff and the node called Sonoff device.

The node is effectively a wrapper over MQTT.
To use the node just drag it into the workspace.
The node has input and output connections.
In the flow below we use an inject node to send a command and a debug node to see the output.
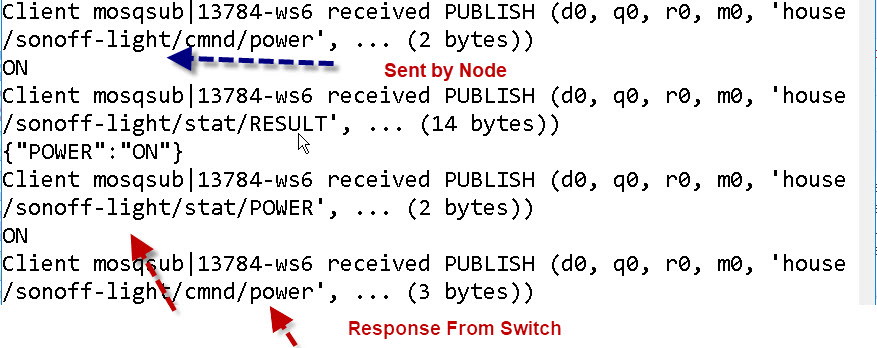
In reality the output node shows us what we sent to the node and not what is sent on by the node using MQTT.
To view the messages sent by the node, and also received by the node we can use the mosquitto_sub tool.
In the screen shot below the node is connected to the broker and reports the switch state as ON even though It is not connected.
When deployed the node sends a status request message but doesn’t get a response.

Configuring the Node
Below is a screen shot of the node configuration screen.
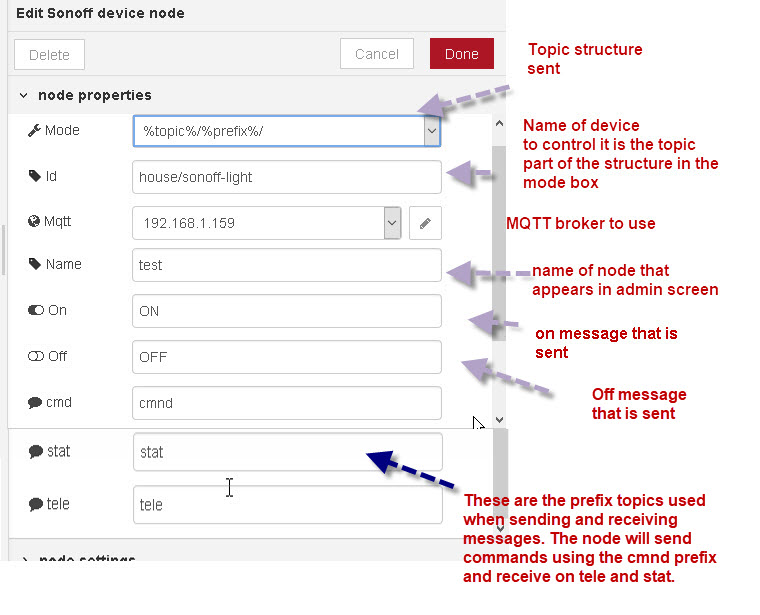
You need to set the mode to match the topic scheme you are using on the network.
The options are
%topic%/%prefix% or %prefix%/%topic%
The topic is the id you configure in the id field and the prefix is cmnd,tele or stat.
So using our structure we will see messages with the following topics:
house/sonoff-light/tele
house/sonoff-light/stat
house/sonoff-light/cmnd
You can set the on/off values that the node sends when it is triggered.
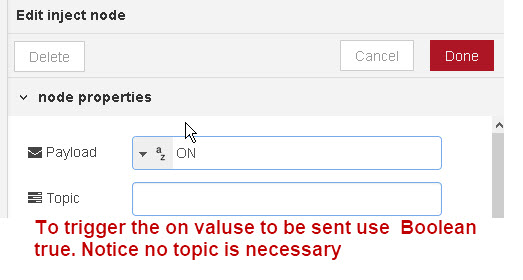
To trigger the on value to be sent you inject Boolean true. To trigger the off value to be sent you inject Boolean false.
Below is the configuration of the inject node for triggering the on value.
Turning the Switch on and Off
The flow in the download is a simple flow to send on/off to a switch using the inject nodes.
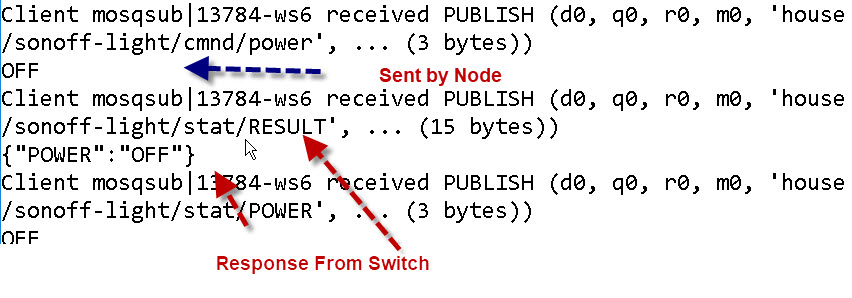
The screen shot shows the messages sent between the node and the switch.
Turn On
Turn OFF
Flow Download

Video
Controlling the Tasmota SonOff Switch with HTTP
 Tasmota devices can be controlled by both HTTP and MQTT.
If you don’t have an MQTT broker or don’t want to use one then you can still control your Tasmota devices using node-red.
To do this you need to use the http request node which is one of the core nodes.
The http request node can be used for.
- Retrieving web pages from a website
- Making API Requests
- Sending and receiving JSON data to a website or API.
- etc
The node will send a request and receive the response and it handles both the request and response.
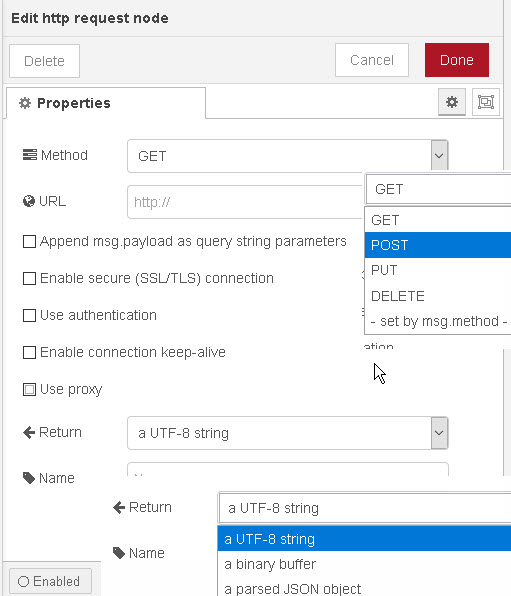
In the HTTP request node you can set the:
- Request Method -GET,POST etc
- URL
- SSL
- Authentication
- Proxy
- Keep Alives
- Return Data
As shown below:
The request method and URL as well as other settings, like content headers, can also be set in the preceding node for creating dynamic requests.
The output is usually a web page but for our Tasmota switch it is JSON. If we leave it as a string means we will need to convert it ourselves to a JavaScript Object.
Turning a Switch On and OFF Simple Flow
Below is a screen shot of the basic flow.
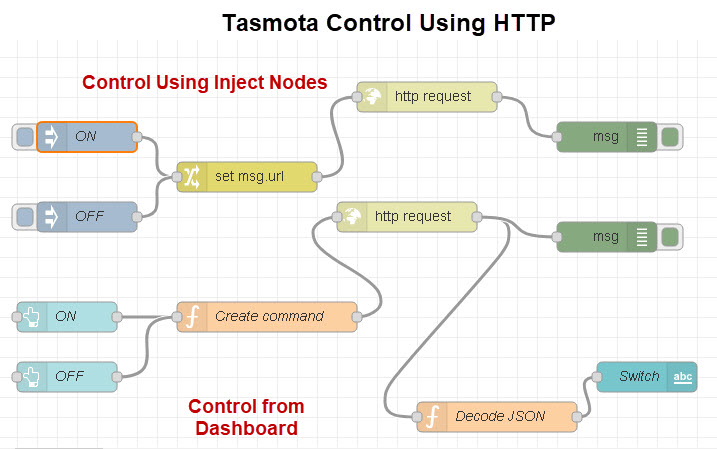
The flow is effectively two flows. The top flow using inject nodes to send the command. The inject node labelled ON looks like this:
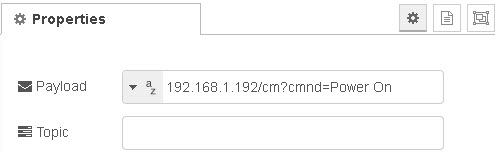
You can see that we use the IP address of the switch and pass the command in the url. See controlling smart home devices using http.
The bottom node using dashboard buttons for on and off and also displays the status. The status is returned as a JSON string and needs to be converted to a JavaScript object to be displayed.

Video Controlling Tasmota Sonoff Switch using HTTP and Node-Red
Related Tutorials and resources:
- Introduction to Sonoff Switches
- Setting up the Sonoff Tasmota MQTT Switch
- Tasmota and Node-Red Project
Related Tutorials
- Setting up the Sonoff Tasmota MQTT Switch
- Introduction to Sonoff Devices
- Smart Home and MQTT
- Install Mosquitto Broker on Raspberry Pi
- Tasmota and Node-Red Project
Poorly written – tried my best to understand, since I need this functionality – failed miserably.
Sorry you are having problems what do you need to understand.
Rgds
Steve
To start with what is and how do you install node-red-contrib-tasmota?
You click on the menu bar top right and then manage pallette and click the install tab and enter tas in search box and it comes up at the top of the list and then click the install button.